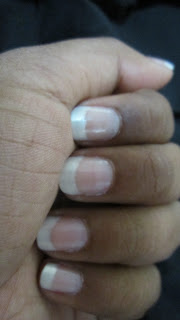
Anyone else HATE having to pay to get your nails done? I
know that I definitely do. I personally don’t even like fake nails, so I always
ask for them to just paint my natural ones. I understand that a lot of people
really like not having to deal with the hassle of doing them themselves because
they feel like it takes too long or that they can’t paint the tips as nicely.
Here’s a quick tutorial for people that like having the
painted French tips but don’t want to pay the $10+ at the salon.
Step 1: Get your
materials together.
- Nail Trimmers/Cutters
- Nail File
- Toothbrush or Nail Brush (either works)
- Clear Base Coat Nail Polish
- Tip Nail Polish Color
- Nude Tone Nail Polish Color
- Clear Top Coat Nail Polish
- Cotton Swabs
- Nail Polish Remover
When it comes to cleaning up my nails, I’m a HUGE fan of the
Salon Shaper©.
Yes, it’s not a professional grade tool with a whole lot of power, but it’s
cheap and it’s easy to use making it a good deal for someone that just dabbles
with their nails but doesn’t expect professional results. I gave a couple out
this past Christmas and I use mine every time I’m doing my nails. But, I since
this is supposed to be a quick tutorial, it’s definitely not necessary. It’s
nice for people that like to put in that extra bit of effort. And it doesn’t
take as long as it does to file manually.
For this tutorial, I’ll be using just a standard nail file. They
come in a pack of ten for a dollar at any pharmacy/drug store.
Step 2: Trim, file
and scrub.
- Remove all old nail polish with remover.
- Trim down your nails to the length that you want. You should focus on making them as even as possible. That doesn't necessarily mean the same length of growth (that’s the white part of the nail past your nail finger tips). Everyone’s fingernails grow a little differently. Like, mine for instance, one of my nails grows just a tad crooked. So when deciding to paint them, I have to trim that one to be even with the others rather than with my finger.
- Once they’re all trimmed, use your nail file to smooth out the edges.
- Push back your cuticles. Remove them if you need to.
- After you shape up your nails, head to the bathroom run some lukewarm water over them and take your brush to them. This will take off all the excess debris.
- All done? Wipe them clean, apply a little moisturizer and it’s time to start painting.
Step 3: Time to paint
- You want to start with using a base coat. This can be the same clear coat as your top coat. It’s really not absolutely necessary since a lot of it gets removed when doing the tips. But if you choose to, let it dry and then time for tips!
- Once your base coat is pristine and dry, grab your tip nail color. You can paint pretty messily, no worries. You can clean it up afterwards. Today, I’ll be doing an American style tip in celebration of Independence Day tomorrow.
This is the color I'm using for my tips:
Here’s a look at what the messiness looks like:
- Let it dry fully and then clean it all up using a cotton swab that you lightly wet with a little bit of nail polish remover. Establish the type of line you’re trying to achieve. Mine will look at little messy because it was done with my less dominant hand.
- Once you’ve got the tip you want, time to make it look professional. Do one coat of the nude toned polish, let dry, and then do the same with a top coat. Ta-Dah! All done! I did an entire hand while typing and taking progress pictures. That simple.
This is my nude-toned color:
Your
nails will end up looking similar to mine. Mine turned out pretty nicely, if I do say so myself.


No comments:
Post a Comment